
No, this is not another beginning of a long-winded philosophical rant.
I told you I was going to talk specifically of the Victory Point requirements for the second half of the game, so here I am: talking about the Victory Point requirements for the second half of the game.
So it’s a tiered ranking system: Less than 19 points and you’ve lost. Boom.
20-29 and a defeat, but less of one. 30’s, kinda a loss. 40’s kinda a win (which is what happened in real life according to the game). 50’s a heck of a win and 60’s John Butterfield will bake you a cake.
So how do we receive these points, you ask?
(waits patiently for everyone reading to ask)
You get 1VP for every Reinforcement position controlled that’s on or adjacent to a major road OR a minor road that exits off the south edge of the map. These are the ones marked with the VP symbol. Apparently there are 42 of these. I’m not counting them, I’m trusting the rulebook on this.
4VPs for completely controlling a draw (all hexes and the engineers have cleared all obstacles).
1VP for every non-infantry, non-HQ unit on the high ground at the end of play…you know, all the chits that aren’t on the high ground as of this point in my current play.
1VP for each armor or regular infantry STEP that moves off the map from a LETTERED exit hex. And these stack with the above VP, so getting armor on the high ground AND getting it to exit counts as 2 VP (or more if it’s a multiple stepped armored unit). Of course, if you lose communication with that exit before end of game, you don’t score those VP because you’ve lost communication with that unit and…well….that stinks, so you have to keep track of them. Spooky.
1VP for each RANGER infantry step that moves off the map from exit F & G (the ones on the South edge of the map) even if not in communication…they’re a hardy bunch.
Finally, subtract 1 VP for each WN that you do not control and each Kampfgruppe Meyer unit that didn’t get used in the game (German Reinforcements).
And there you have it.
So as I start this 11 o’clock hour (oooo, it’s getting close to lunch!), I have to focus on getting my armor off the beach, getting my infantry off the map, and controlling those VP spaces.
EEeeeeaasssy, right?
I want me some of that Butterfield cake! (John, if somehow you end up reading this, I’m sorry if some Alpha gamer asks you for cake. But anyway, HI! Thanks for reading, and for all the great games you make!)
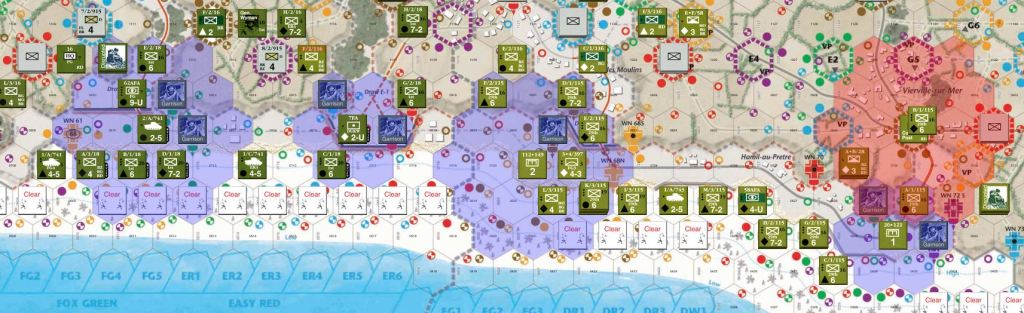
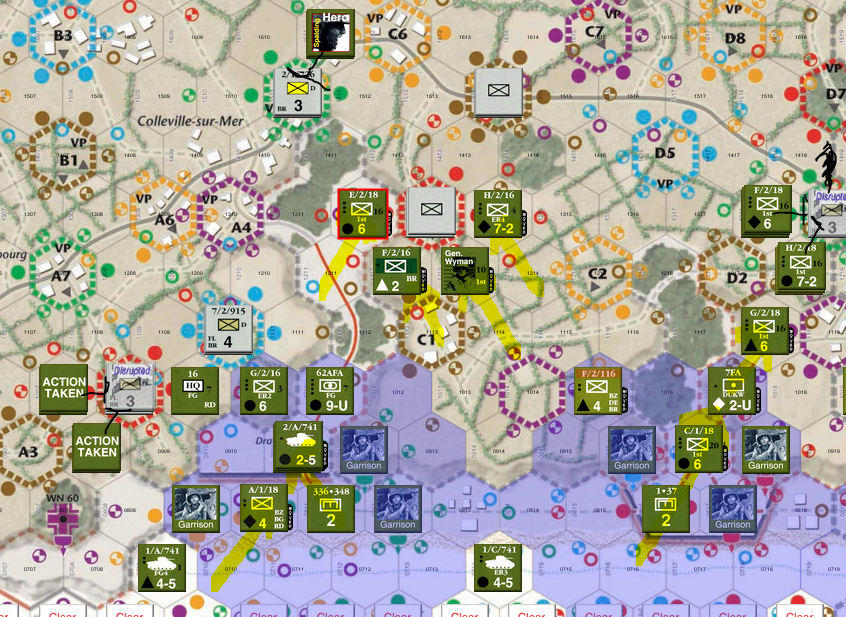
So I don’t have any Landing Checks to worry about….no plucky armors from hours ago still trying to land this time. I do have a bunch of units on the West Beach lining up, though, including a HQ unit, though. I load them up on the Eastern draw, hoping to help over there since the Western line is….kinda okay? Once that Red Bunker is taken out, that is. Maybe.
I actually end up putting a Ranger unit in the middle to go up the bluff there to act as a backup to either side depending on how things go this turn.
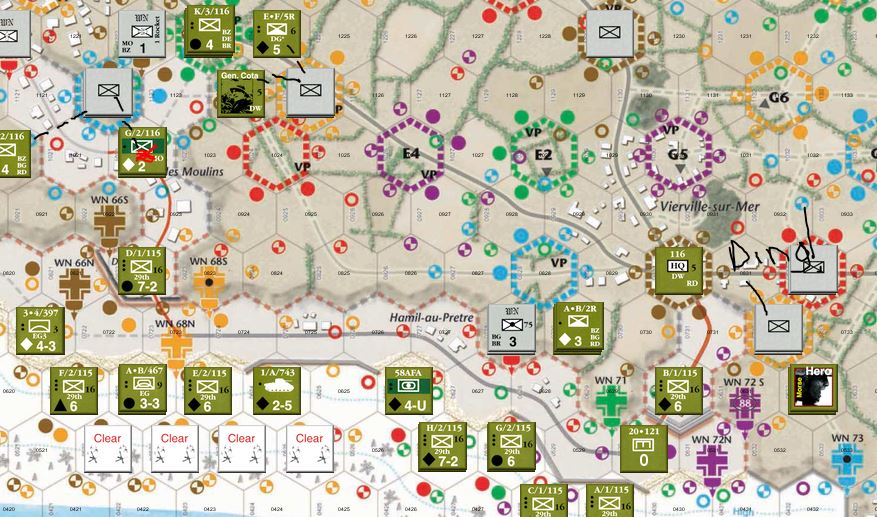
Event: Place German Reinforcements in Zones A, E and G. Yikes.
Zone A plops it in A2, right next to a Unit making that side of the board a mess. E is even worse, appearing behind General Cota and all the units trying to take out the WN at the end of Draw D-3. G has some units outside of town near the new HQ I’m setting up.

Hrmph. I mean, on the plus side, there can only be 11 Division reinforcements before they’re done.
On the downside….that’s a lot of people with guns who want to shoot me.
And one person with a gun who wants to shoot me is too many.
During the fire phase, we only have one one firing on the East Beach:
The downside is this dropped the unit a step and counted it as a Casualty for East Beach, brining the total to 7. And that’s the OTHER thing we’re fighting for, not hitting the loss limit. No, it’s not still 8. That’d be ridiculous. But it is 14 for each beach. We hit that, and it’s automatic game over. So…um….don’t do that.
West Beach is a mess. Blue fires down and destroys the units down in the Draw, while Yellow Resupplies and Reinforces, causing another unit to appear and also injure E*F/5R (though I forgot to draw a red bit on the chit there). Oof. Also Artillery fire from the 88 inch cannon fired. Needs just 1 observer, and the Red Bunker counts, so one of those brand spankin’ new Infantry hitting the shores takes a Step loss. *SIGH*
And now Second Event: German Reinforcements in Zones C and D. Are you freaking kidding me? I think I’ve drawn every freaking Reinforcement event in the damn game.
Annnyyyywaaaayyy.
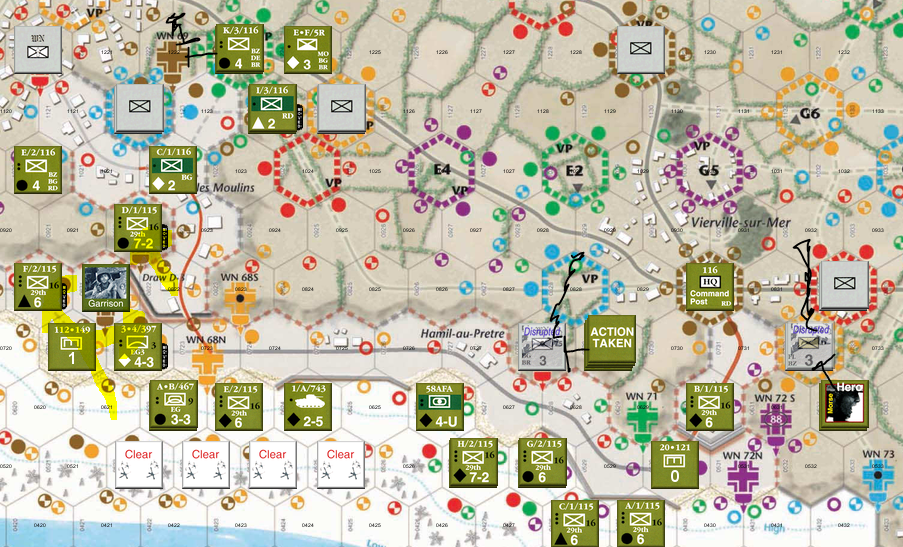
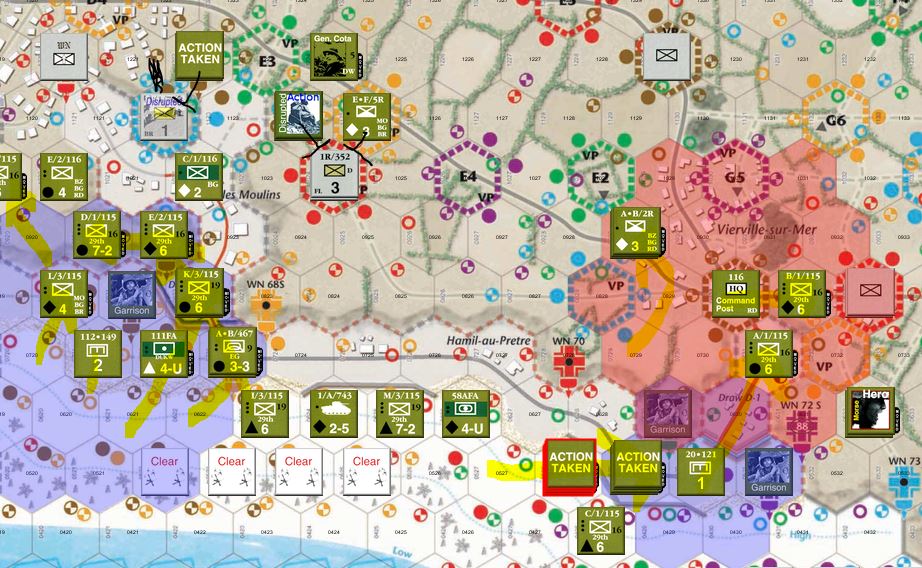
So now we have our HQ and Engineer phase. I’m going to increase the size on Draw E-1 since that seems to be the most open on the East side, and D-3 because they need the most help. So they both now have a Range of 1, so everything gets a free move if they’re adjacent to them AND there’s no terrain penalties (except for cliffs and such, of course, let’s be reasonable here).
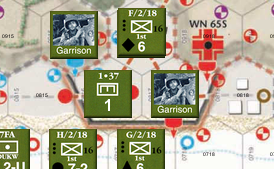
That also puts these nice little Garrison chits on any WN spots in Engineer range. That means those locations can’t be Re-occupied anymore because they’re now occupied by Americans who bring down the real estate value by too much. Or something.
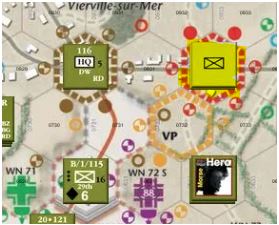
I also flip the HQ in Vierville-sur-Mer, even though it’s dangerous over there. Got my fingers crossed that I can clear that spot out soon.
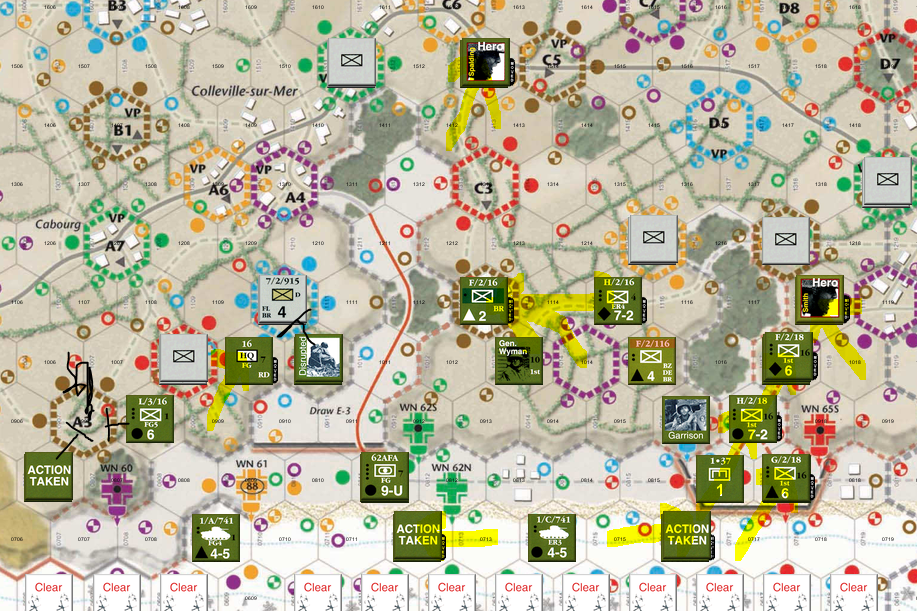
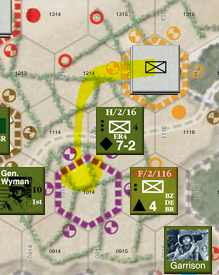
A lot of complicated movement here as I try to get the best units in the best places. Also trying to get some Armor close to the Engineers to get them to go down the Draws, too. That Eastern flank is a royal pain in the arse, but once L/3/16 and I/3/16 get freed up and are able to take the road behind that Red Reinforcement, they should be able to clear everything up and take Cabourg and all those VP locations.
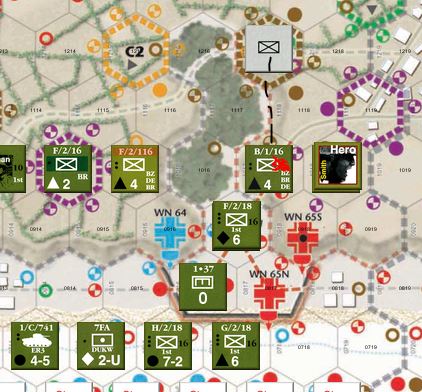
Not as much movement, but a lot more action on the West Beach. Morse saves the day again, taking down another Depth marker. I had to use most Actions just getting units to the East side of Draw D-3 because poor E/2/116 is all alone over there, and I don’t want them charging up against the Red WN there all alone. Things will get better once I get that second HQ on shore.
But that will happen, next turn. Speaking of which:
We have now hit 20 turns. Noon. No shadows in the shell craters. I have a shakey beachhead. I can easily be pushed back into the ocean. Twelve turns to get a boatload of Victory points. I gotta get moving, but you see more movement is possible every turn, but so are more Germans.
Let’s go.
As all the units landing this turn are Infantry, I only have to check to see if I draw a mine result, and luckily I don’t (especially since a few of the beach spots I’m landing on haven’t been cleared yet), so all ashore who’s goin’ ashore.
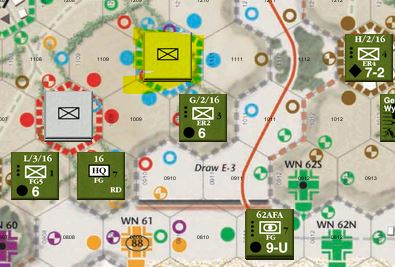
I get 3 Infantry and 1 Ranger unit on the East Beach, and 1 Artillery unit for West to get ready to land. I set most of the Infantry to help with Draw E-3. It’s messy over there.
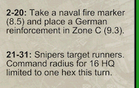
We’re turn 20, so we get the Naval Fire marker! That’s a Strength 9-U token we can use once on any attack. Booya. Were it turn 21, we’d be alright as HQ 16 is the poor sap that’s stuck near draw E-3 trying to find a place to call home.
The Reinforcement is put on the West side of E-3…because WHY NOT!?!
Ooo, we have our first German Advance! With a Yellow ‘A’ on a hex with an arrow pointing to an unoccupied Reinforcement position, you check to see if a few conditions are met. The condition of “Unrevealed German with a Depth Marker” was met, and then you check if a path could be made…it could, so this guy moves up.
Well. Ain’t that a humdinger?
Luckily, that’s all that happened, even with Red firing, I got lucky on the shape drawn. Phew.
Yellow also Advances on West Beach, which causes a one hex jump for one unit. But that’s all that happens on that side, too. Again, a bit of luck as everyone firing was out of range of my units. However, all the colors drawn also removed the two Disrupted tokens I had on the board. Hrmph.
And the second event:
HA! Remove all Disrupted tokens! Do I even have any left? Oh, I had one left. Well, still. Not as bad as it could have been.
Back to HQ phase.
My HQ on East Beach is pinned down in a heaping load of crap, but West Beach is able to increase its range for the first time. Sadly that still keeps it at ‘1’ for now. With my Engineers, I’m going to have the other two increase ranges that didn’t last turn, so that all 4 have a Range of ‘1’, mainly to put Garrisons on a bunch more WN positions to prevent Reoccupation. Don’t need that happening. As much as I would like a lot more armor moving up the Draws to help break us out of this German line, I would also hate for us to get pushed back into the ocean, too.
Now on to the actual Actions.
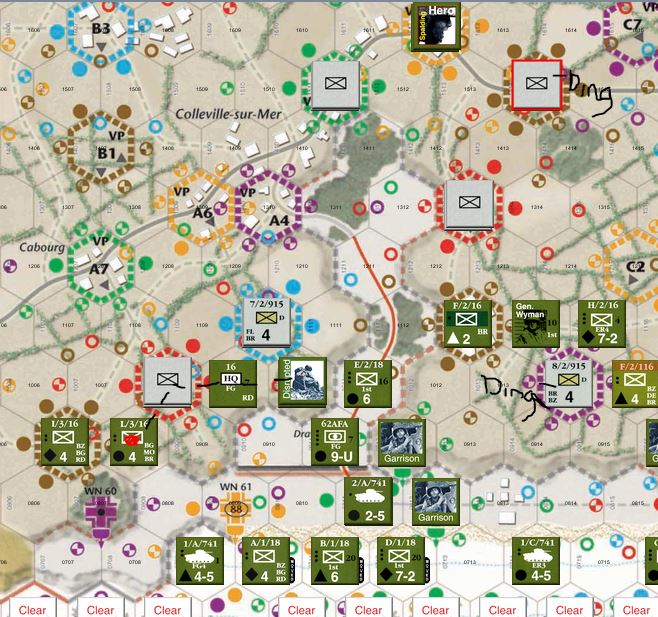
More scrambling for position. We were able to take down the Purple Reinforcement, and I know it looks like I’m attacking my own unit there on the right, but Smith’s unit took down that Brown Reinforcement and then two units used the road to march into that hex.
The Red Bunker is FINALLY no more! Morse is chiseling away at the far Western defenses as more infantry begin to make their way up that draw, and the…mess around the other draw is…still a mess, but I’m getting other units in there.
But now the turn is over.
*pantpantpant*
The deck is reshuffled. Kind of curious just how much thought was put into when the deck should be reshuffled. How often events show up? How often each color should fire? Who crunched those numbers? What distribution were they looking for? I for one would like to NOT have the “Reinforcements in Zone..” come up yet again, but now that I’m past turn 20, all the events are different, so I’m guessing it’s for the color/shape distribution, but I’m speculating here. Dunno, just thinking outload, that might be mentioned in the comments at the back of the rulebook. I’ll take a look at those later, but for now, 12:30.
Mines explode on the East Beach…which DOES affect one of the landing Infantry. Dangit. A/1/18 lands on shore with a step already taken off. I was thinking of putting them one hex over to support the mess near the old Purple Bunker, but nooooo, I thought that’d be gone by the time they landed, so get them closer to the road. *sigh*
On West Beach, an Artillery is landing, so I have to check the letter there. That, too, suffers one Step of damage. As it only had one Step, it blows up. *another sigh*
No new units approach, so on to the Event: GI Initiative, one extra action! FOUR Actions this turn!

German Fire:
Red fires and wounds in that tangle on the Eastern side, while Purple unDistrupts and a Brown Reinforcement appears in the South.
And Chrome crashed as I was typing that, so I had to restart everything. Awesome. (I feel like I typed that a few weeks or months ago on a similar action, hmmmm)
The only thing that happened on the West Beach was Morse’s unit had a random Patrol fall upon it and Disrupt the Unit. Annoying.
And our second Event: Remove all Disruption from German Units.
I’m going to have to take a count of just how often that thing comes up. I mean, this only starts on this particular card starting on turn 21. Lucky me, it’s Turn 21. Were it Turn 2-20, I’d get a Hero Marker and the Germans would get a Depth Marker, but Nooooooo…
Actually, there aren’t any Disruption Markers on the Map. They were already removed from the Fire Step. Waddya know?
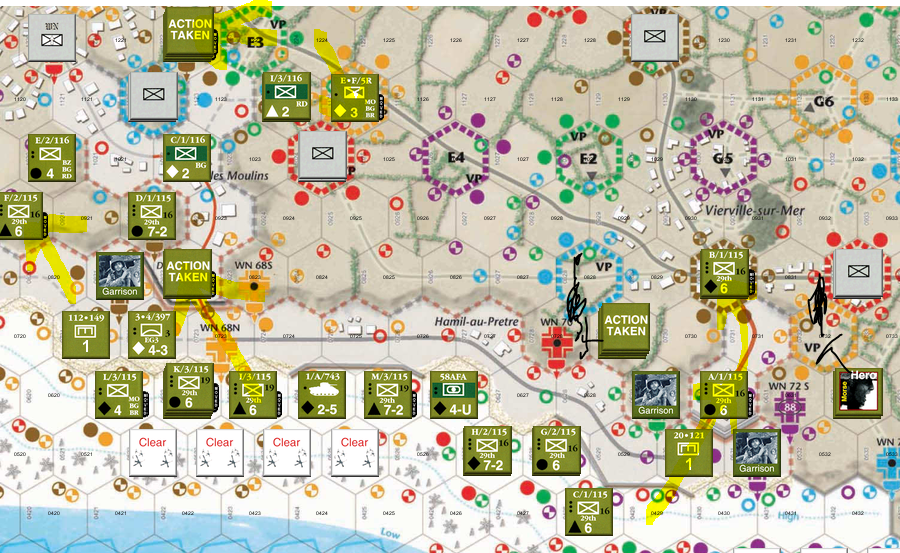
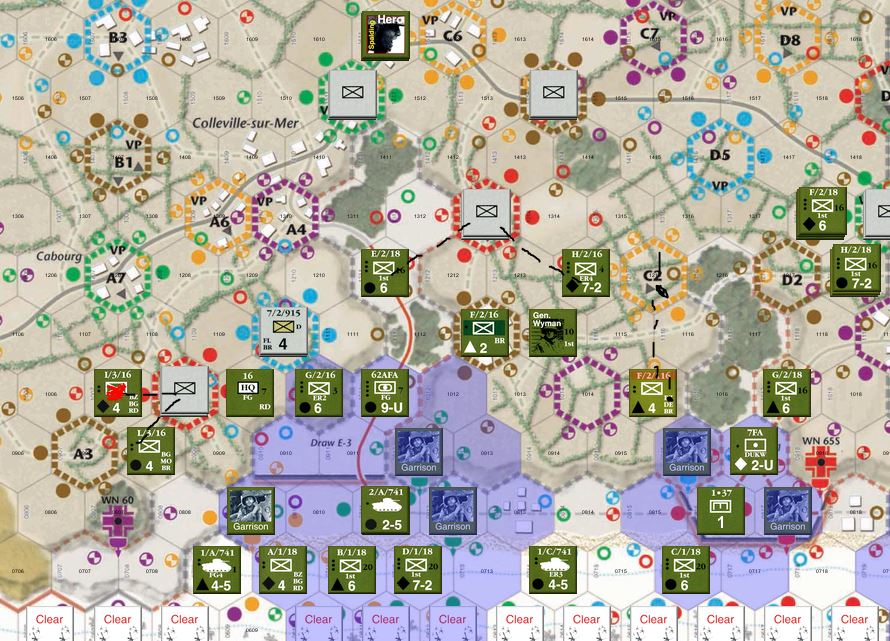
HQ 116 now has a Command Range of 2 hexes. HQ 16 on East Beach is still waiting for rescue. Newly landed 115 will set up shop once a few more hexes inland.
And hey, neat, you can have Vassal turn on the HQ and Engineer ranges. I upped two of the Engineers and now take a look:
Looks nifty! Of course, it doesn’t work if it’s in a fire range of a German Unit, so some of those hexes aren’t truly in range, but it works great for my purposes.
Now my chance to use FOUR actions!

Continuing to make headway, and I’m finally getting around to taking on that Red Reinforcement.
Major progress on the East side here as I have a wave of Infantry and Armor now coming down the Draw, but the interior is a bit tough as the Red Reinforcement needs a flank attack, so I’ll need to do an Infiltration Action to do that….which I’ll explain when I get to do that.
I’m lining up a bunch of units on the West side there to lead a wave in Draw D-1 as well to eventually make it out of the Western Exit if H/1/115, A/1/115 and Morse’s unit can take out that Red Reinforcement there. Then I hope to keep a few units sitting on the E and G zones for the VPs and get the Armor out.
I mean, seems like a plan, right?
We start the next turn with no landing checks as there’s nothing landing. But a few units appear to be landing on East Beach for next turn. Yay! The last HQ will be landing. I set it to land near the Western Draw to help unload that area and get infantry down those central roads to control all those VP areas there. I also send two of the Infantry coming in to back it up, and send the other two Infantry to the other draw to help out with that mess.
The event is more German Reinforcements but….the reinforcement pool is empty! So, unless the Kra…Kamp..okay, here we go: Kampgruppe Meyer event is drawn adding 8 more Reinforcements to the pool, that should be all the Germans on the board for now, unless some WN get Reoccupied….which can happen, given there are a few with German communication right now due to some not exactly tight lines on my end. Oops.
So German Fire:
An ambush Disrupts F/2/116, and Red takes a Step out of I/3/16, raising the Casualty meter again. Still have a ways to go before I hit the magic number, but still, not great there.
One WN unDisrupts, but no biggie, it should be gone on my turn, but a Mortar attack from deep South destroys a unit that was on the way to help out General Cota. I could have done without that.
Second Event: Add one Depth Marker to a German Unit in each Sector.
Hrmph.
I mean, on the plus side, all the Units in East Sector already have Depth Markers, so HA, Eat it, Butterfield! But West will have the WN at the top of Draw D-3 gain a Depth. Because the little fighting force of K/3/116 totally needs that.
HQ/Engineer phase is a toughie. Don’t know exactly which Engineer base to increase on the East side. Draw E-3 needs the largest radius in order to let the Armor move down the roads (if the road is red, that means its mined and no armor units can go down it until Engineers can get to it) BUT with just one more range, E-1 will be “open” allowing Armor to go top side, which is worth some points and possible support. And actually, now that I’m looking at it, I have an HQ incoming there. If I can get a Command Post set up there, I can have that Dukw nearby and possibly be able to add 2 Strength to a large part of the board.
On the West I’m focusing on Draw D-3 for some reason. Seems like a bad idea, really, but that’s where all my armor is, so I gotta get them inland.
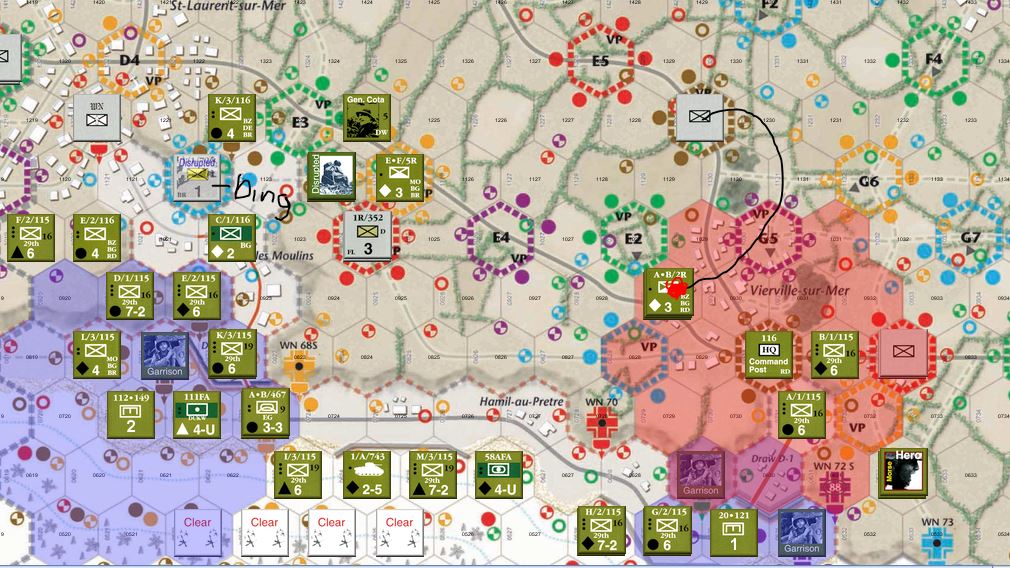
Hitting a bit of a stalemate as that Red Reinforcement and Green Reinforcement on the left fail to go anywhere, but the one on the right loses its Depth Marker. I’m set up now to get rid of the one in the middle, freeing up the Draw and allow all units to get off the beach…eventually. Spalding is stuck in building to building fighting up there, needing FR and AR to win, so he’ll have to wait for support before being able to take those VP locations.
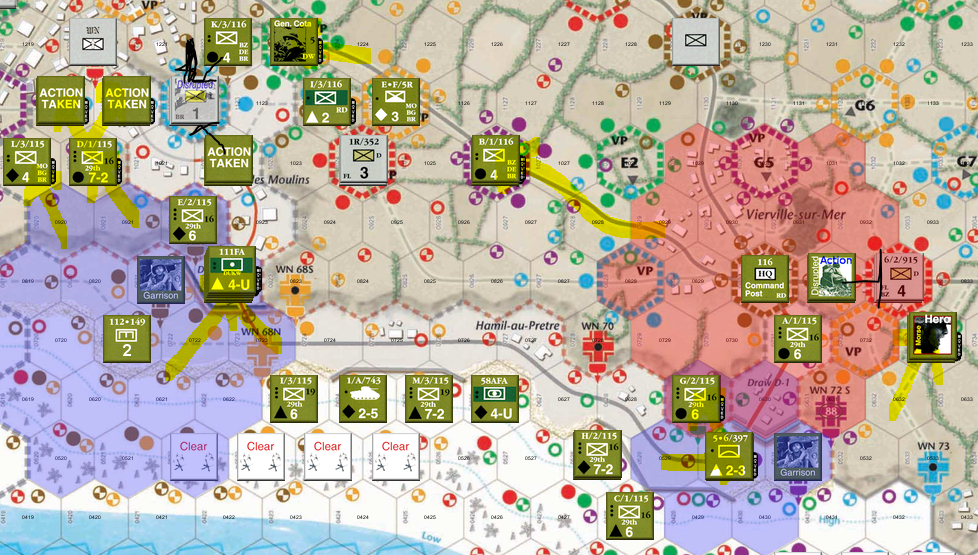
Also a bit of a snag appearing here. I got a bit overzealous and didn’t wait for Morse before taking a peak at what the Germans had waiting for me. Was hoping for a “No effect,” but instead ended up Disrupting my own unit, which means I’ll have to wait another turn before I can do anything about them. Not going to do an Infiltration Move to Flank IR/352 there in the middle, instead going to use B/1/116 to get around coming up the road there. Wasn’t able to remove that new Depth Marker due to want of an MO. I hope once I take down the Red WN, I can just shift focus over and finally clear that out. I’ve got enough Units over there, consarnit.
I also have a huge stack of units waiting on the road to come up. There’s an HQ in there somewhere that I hope to be able to set up as a Command Post soon.
Soon.

Pingback: Touring Wine Country | Very Wordy